The tank relining process restores an existing industrial, municipal, or commercial tank by addressing deterioration, preparing the substrate, installing a compatible lining system, and verifying the completed work before the tank returns to service.
Quick Answer
Industrial tank relining typically includes an initial condition assessment, tank shutdown and cleaning, removal of the failed lining, substrate repair, abrasive blasting or other surface preparation, installation of the selected lining system, quality-control testing, curing, and final inspection.
The exact process depends on the tank material, stored product, existing damage, operating temperature, chemical exposure, and required return-to-service schedule.
Why Tank Relining Requires More Than Applying a New Coating
A tank lining is only as reliable as the surface beneath it and the process used to install it.
When a lining begins peeling, blistering, cracking, leaking, or separating from the substrate, applying another coating over the damaged system usually does not correct the underlying problem. Moisture, contamination, corrosion, inadequate surface profile, incompatible materials, or structural movement may still be present.
A professional tank rehabilitation process is designed to identify those conditions before the new lining is installed.
Southern Industrial Linings provides industrial, municipal, and commercial tank lining and repair services for multiple tank environments, including water, wastewater, chemical, petroleum, steel, fiberglass, and containment applications.
Step 1: Inspect the Tank and Define the Failure
The process begins with an inspection of the tank, the existing lining, and the accessible structural components.
The inspection may identify:
- Corrosion or surface pitting
- Peeling or delaminated coatings
- Blisters and trapped moisture
- Cracks, holes, or active leaks
- Failed seams, gaskets, or bolt connections
- Damage around penetrations and fittings
- Chemical attack
- Abrasion or impact damage
- Previous repairs that are no longer performing
The objective is not simply to confirm that the lining has failed. The contractor must determine why it failed and whether the tank requires coating replacement, localized repairs, structural rehabilitation, or a combination of services.
For bolted steel tanks, seams, bolt heads, gaskets, panel edges, and areas of coating deterioration require particular attention because each can become a potential leak or corrosion point.
Step 2: Review the Tank’s Operating Conditions
The next step is to document what the tank stores and how it operates.
Important considerations include:
- The stored liquid or chemical
- Chemical concentration
- pH range
- Operating temperature
- Cleaning procedures
- Filling and draining cycles
- Agitation or mechanical wear
- Required lining thickness
- Potable-water or other service requirements
- Available shutdown window
This information is used to evaluate lining compatibility. A material that performs well in a water tank may not be appropriate for concentrated acids, petroleum products, wastewater, solvents, or elevated-temperature process conditions.
Polyurea, epoxy, vinyl ester, rubber, and other lining systems have different performance characteristics. Material selection must be based on the actual exposure rather than a one-system-fits-all recommendation.
Step 3: Drain, Isolate, Clean, and Prepare the Work Area
Before rehabilitation begins, the tank must be removed from service and properly isolated according to the facility’s procedures.
Residual product, sludge, scale, oils, and other contaminants must be removed. Chemical tanks may require additional decontamination before personnel or equipment can safely enter the work area.
The project plan should also address:
- Access to the tank
- Ventilation
- Lighting
- Dust and debris control
- Protection of surrounding equipment
- Removal of disconnected components
- Coordination with facility operations
- Applicable confined-space and site-safety procedures
The condition of the tank after cleaning often provides a clearer view of corrosion, substrate loss, cracks, seam deterioration, and previous coating failures.
Step 4: Remove the Failed Lining
Loose, damaged, or incompatible lining material must be removed before the replacement system is installed.
Depending on the existing coating and substrate, removal may involve abrasive blasting, mechanical grinding, scraping, scarification, or another approved method.
This stage is critical because a new lining cannot create a durable bond to material that is already separating from the tank.
The removal process may expose hidden conditions such as deeper corrosion, deteriorated concrete, damaged fiberglass laminate, weak welds, or moisture beneath the previous lining.
Step 5: Repair the Tank Substrate
Relining does not replace structural repair when structural repair is needed.
After the failed material is removed, the contractor evaluates the exposed substrate and completes the necessary repairs. The scope may include:
- Filling corrosion pits
- Repairing cracks or voids
- Patching holes
- Rebuilding deteriorated concrete
- Repairing fiberglass laminate
- Replacing or repairing damaged steel
- Addressing weld deficiencies
- Sealing or rebuilding seams
- Repairing areas around penetrations
- Replacing damaged bolts, gaskets, or panels
Bolted tanks may require a combination of panel, seam, gasket, bolt, foundation, and lining work. Fiberglass tanks may require laminate repair to restore structural stability before a protective lining is installed.
Step 6: Prepare the Surface for Adhesion
Surface preparation is one of the most important steps in the tank relining process.
The objective is to create a clean, sound, and properly profiled surface that allows the selected lining to adhere.
For steel tanks, abrasive blasting is commonly used to remove corrosion, mill scale, old coatings, and contamination while producing the required surface profile. Concrete and fiberglass surfaces may require different preparation methods based on their condition and the specified lining system.
Surface preparation should address:
- Cleanliness
- Surface profile
- Dust removal
- Soluble contaminants
- Residual oils
- Moisture
- Sharp edges
- Weld spatter
- Voids and surface irregularities
Southern Industrial Linings identifies abrasive blasting and proper preparation as fundamental parts of successful coating and lining installation.
Step 7: Verify Environmental Conditions
Before application begins, the crew verifies that jobsite conditions fall within the lining manufacturer’s requirements.
This may include measuring:
- Ambient temperature
- Substrate temperature
- Relative humidity
- Dew point
- Surface moisture
- Ventilation conditions
Condensation or excessive moisture can interfere with adhesion. Temperature can also affect application, cure time, and the performance of multi-component materials.
Environmental readings should be documented throughout the application when required by the project specification.
Step 8: Apply Primer and Detail Critical Areas
Some lining systems require a primer or substrate conditioner before the primary lining is installed.
The contractor may also stripe-coat or reinforce difficult areas, including:
- Welds
- Corners
- Seams
- Bolt heads
- Edges
- Fittings
- Penetrations
- Transitions between materials
- Previously repaired areas
These locations are more difficult to cover uniformly and may experience additional stress during operation.
Detailing them before full application helps create a continuous protective barrier.
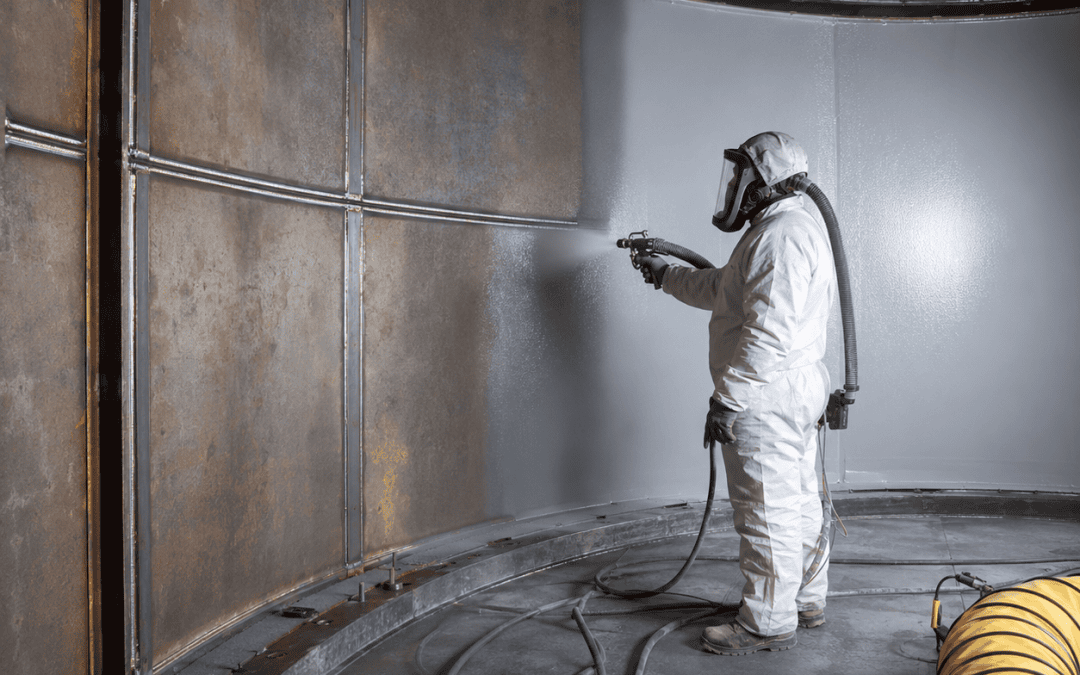
Step 9: Install the Selected Tank Lining System
The lining is then applied according to the project specification and manufacturer requirements.
Depending on the system, application may be completed by spraying, rolling, brushing, troweling, or installing a reinforced lining assembly.
The crew monitors coverage and thickness during installation. Multiple passes or coats may be required to reach the specified thickness and achieve a continuous membrane.
Polyurea systems can provide a seamless lining across seams, bolt heads, welds, and complex surfaces. They are also associated with rapid curing, flexibility, and resistance to certain chemical and mechanical exposures. However, the selected formulation must still be verified against the tank’s specific service conditions.
Step 10: Inspect and Test the Completed Lining
The completed lining should be inspected before the tank returns to operation.
Quality-control procedures vary by system and project requirements but may include:
- Visual inspection
- Dry-film thickness measurements
- Wet-film measurements during application
- Holiday or discontinuity testing
- Adhesion testing
- Cure verification
- Inspection of seams and penetrations
- Repair of pinholes, thin areas, or defects
Any identified deficiencies should be repaired and retested.
This verification stage provides documentation that the lining has been applied continuously and in accordance with the project requirements.
Step 11: Complete Final Cure and Return-to-Service Review
Even fast-curing systems may require a defined period before exposure to the stored product.
The contractor reviews the manufacturer’s cure requirements, service temperature, chemical exposure, and facility operating conditions before authorizing return to service.
The tank may also require cleaning, rinsing, disinfection, or other preparation depending on its intended use.
The final closeout package may include:
- Inspection records
- Environmental readings
- Thickness measurements
- Testing results
- Repair documentation
- Product data
- Application records
- Photographs
- Recommended inspection intervals
How Long Does the Tank Relining Process Take?
There is no standard project duration for every tank.
The schedule depends on:
- Tank size and configuration
- Ease of access
- Amount of cleaning required